Translate this page into:
Autologous Smashed Dermal Graft with Epidermal Re-closure: Modified Technique for Acne Scars
Address for correspondence: Dr. Umashankar Nagaraju, Department of Dermatology, Rajarajeswari Medical College and Hospital, Kambipura, Mysore Road, Bengaluru, Karnataka, India. E-mail: usdermavision@gmail.com
This is an open access article distributed under the terms of the Creative Commons Attribution-NonCommercial-ShareAlike 3.0 License, which allows others to remix, tweak, and build upon the work non-commercially, as long as the author is credited and the new creations are licensed under the identical terms.
This article was originally published by Medknow Publications & Media Pvt Ltd and was migrated to Scientific Scholar after the change of Publisher.
Abstract
Conventional technique of dermal grafting for acne scars where the source of filler material used is the patient's own dermis requires longer surgical time, recovery period and can result in unsightly scars at the donor area. Hence, it is not suitable for treating a larger number of scars. Furthermore, these dermal grafts are firm and cannot be contoured to fit all types of acne scars. Occurrence of epidermal cyst and secondary infection is another complication if epidermis is not completely removed. Enzymatic techniques need trypsinisation which is expensive and requires laboratory facilities.
Keywords
Acne scars
box scars
rolling scars
smashed dermal graft
subcision
Innovation: Smashed dermal grafting technique with re-closure of the donor area with epidermis addresses some of these issues.
INTRODUCTION
Dermal grafts, autologous fat and injectable fillers have been used to correct deeper contour defects.[12] Various treatment modalities alone or in combination have been tried for acne scars, which include dermabrasion, excisional surgery with closure, punch grafting and elevation, collagen implants, silicone injections, chemical peeling and laser abrasion.[3] More than one type of acne scars such as box scar, rolling scar and ice pick scars can be present at a given point of time in an individual. Hence, all these need to be addressed while treating a patient. Conventional technique of dermal grafting for acne scars involves implantation of appropriately dissected deep dermis into the corresponding recipient areas.[2] Enzymatic techniques were introduced to overcome some of the disadvantages of conventional method by which dermis was made soft, flexible and easily mouldable.[4] Survival rates of dermal grafts are much higher than fat transplants and are almost permanent. Results achieved can be gratifying.[5]
TECHNIQUE
Equipment needed
The following equipments are needed: graft holding forceps, razor blade holding dermatome, biopsy punches (2 mm), wooden spatula, 15 number surgical blade and Bard-Parker handle, artery, iris scissor, Petri dishes, disposable syringes of 1 ml (tuberculin) and 2 ml and 18-gauge needle.
Patients are ideally taken up after subcision[6] done 2 weeks before the dermal grafting. This helps in creating dermal pockets and will be easy for the implantation of dermal grafts.
Step 1: Harvesting dermal graft
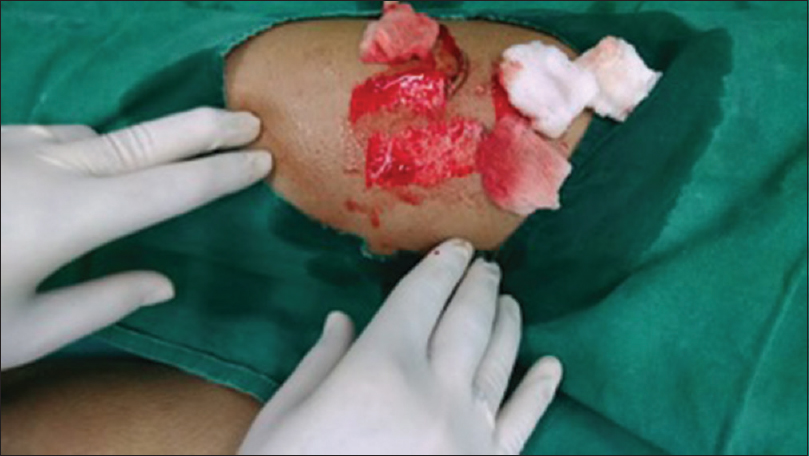
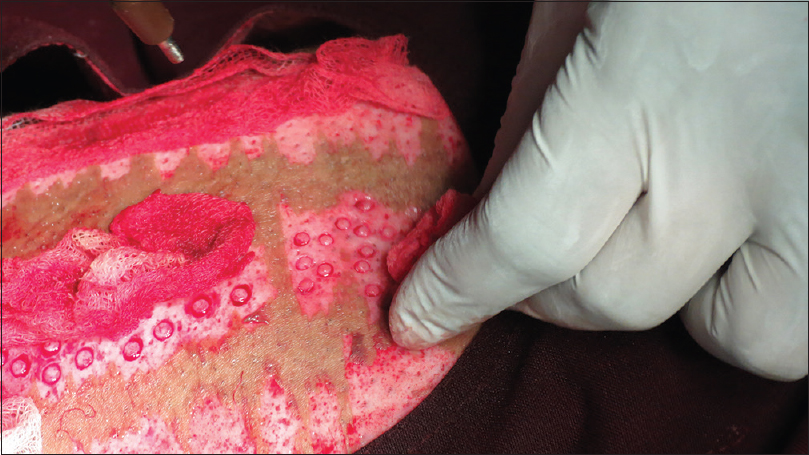
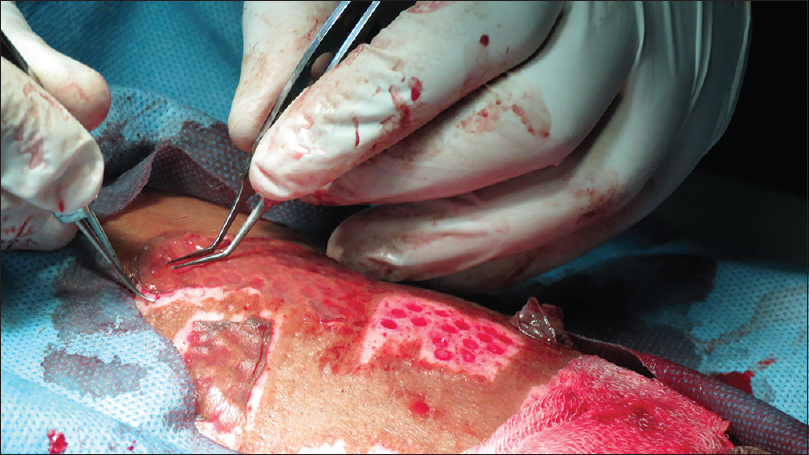
Donor site is anaesthetised using topical anaesthesia; a mixture of lidocaine 25 mg and prilocaine 25 mg is applied after surgical cleaning, under occlusion, for 1 h. Ultra split-thickness graft is harvested from the antero-lateral aspect of the thigh using razor blade holding dermatome. Epidermal ultra split-thickness graft harvested is left intact at the advancing edge [Figure 1]. It is secured in gauge soaked in normal saline [Figure 2].

- Epidermis harvested (ultra split-thickness graft) is left intact at the advancing edge
- Epidermis is secured in gauge soaked in saline
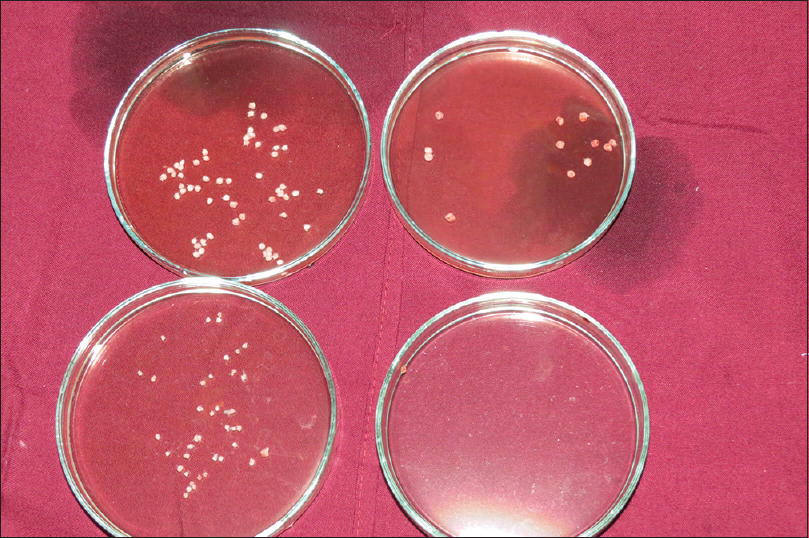
Dermal tissue is harvested by punches of size 2 mm [Figure 3]. Care should be taken to avoid the hair follicles while harvesting the graft. Excess fat should be trimmed, and dermal grafts are transferred to Petri dish containing normal saline [Figure 4].
- Dermal tissue is harvested by punches of size 2 mm
- Dermal grafts are transferred to Petri dish containing normal saline
Step 2: Closing the donor site with epidermal sheet which acts as biological dressing
To ensure easy flow of serum from donor area, multiple nicks are made using 18-gauge needle on the epidermal sheet which is secured at the advanced end in normal saline gauze [Figure 5]. Donor area is closed back with this sheet of epidermis which is spread uniformly and fixed with cyanoacrylate glue which acts as biological dressing [Figure 6]. Advantage of ultra split-thickness graft is that due to lack of dermal tissue, there is no curling of epidermis and hence it is easy to spread. Firm compression is applied over the graft to prevent haematoma or seroma [Figure 7]. Secondary dressing is done with paraffin gauze [Figure 8]. Dressing is removed on the 8th day.
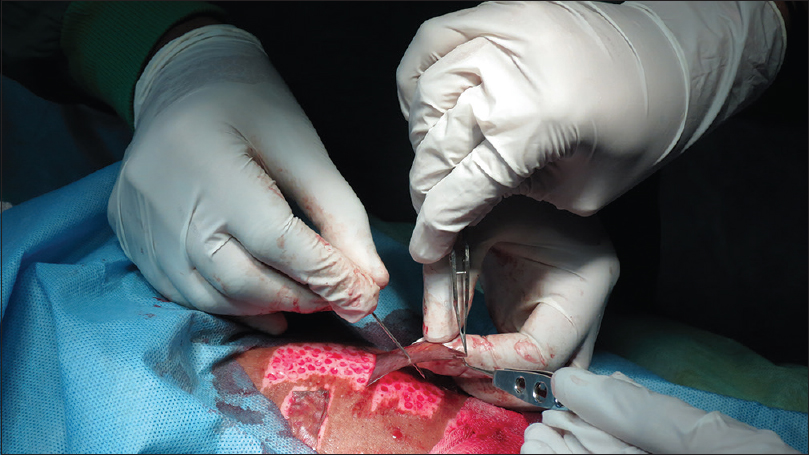
- Multiple nicks are made using 18-gauge needle on the epidermal sheet
- Donor area is closed back with the epidermis and secured
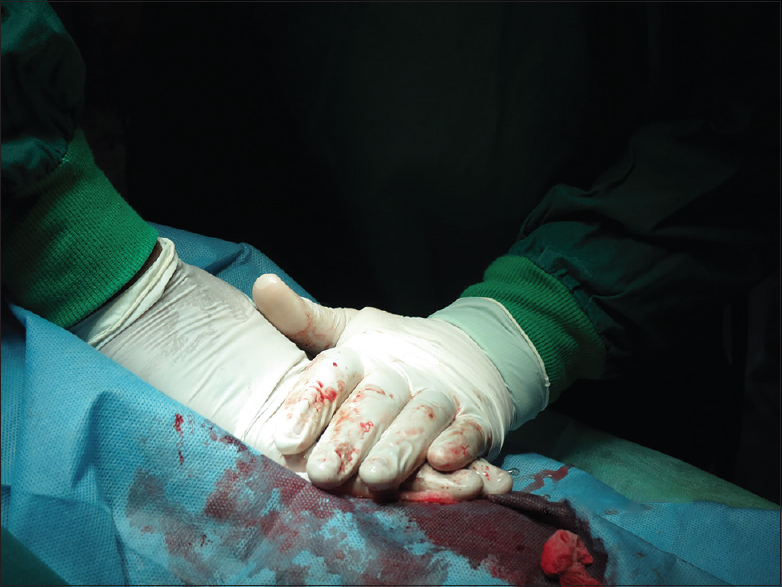
- Firm compression is applied over the graft
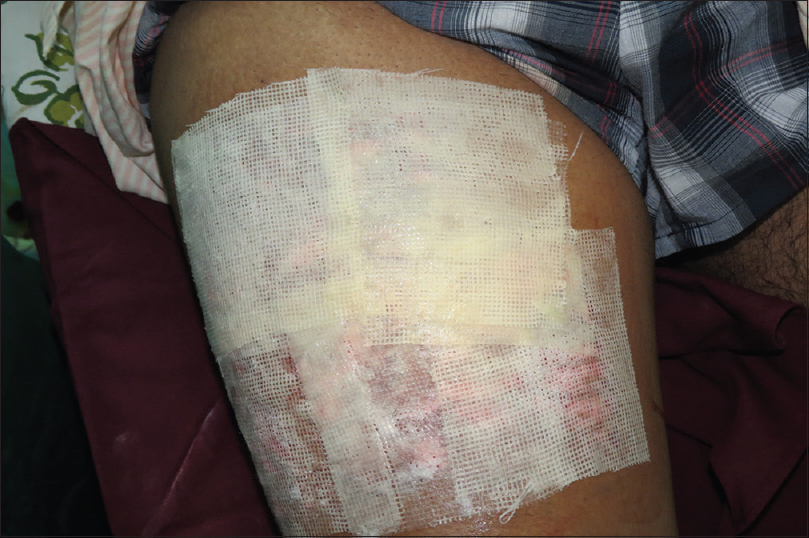
- Secondary dressing done with paraffin gauze
Step 3: Preparing the dermal graft
Dermal grafts are placed on a sterile wooden spatula. These grafts are held with graft holding forceps in one hand and are minced with 15 number surgical blade to form smashed dermal grafts with the other hand [Figure 9]. This step can also be performed using curved iris scissors. These grafts thus obtained are mouldable to any shape and are suitable for box scar, rolling scar and linear and irregular geometrical scars.
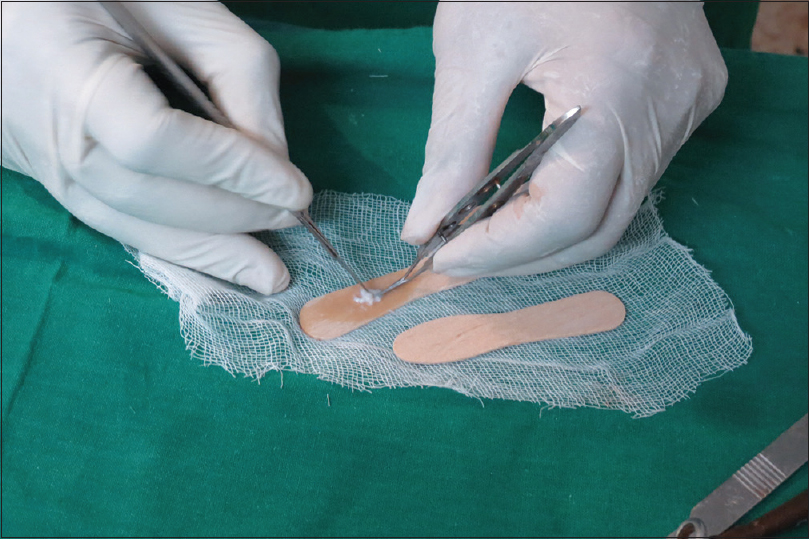
- Grafts are minced with a 15 number surgical blade
Step 4: Inserting the dermal graft
Smashed dermal graft is aspirated into 1 ml tuberculin syringe with 18-gauge needle attached to it [Figure 10]. It is injected into the dermal pockets beneath the scars [Figure 11]. Smashed dermal grafts can also be inserted with graft holding forceps. External manipulation can then be performed till maximum correction is achieved.
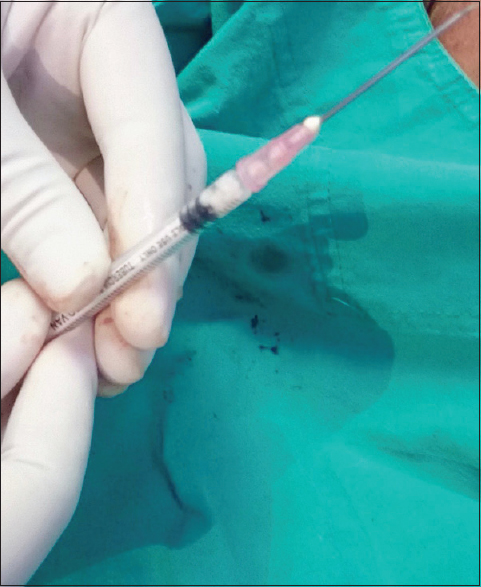
- Smashed dermal grafts are aspirated into 1 ml syringe with 18-gauge needle attached to it

- Injecting dermal graft
Follow-up
The patients are advised to be in rest for 8 days. Mild haematoma and inflammatory changes may be noticed at the recipient site and they are the only immediate complication which will last for 1 week. Dressing at donor site is removed after 8 days.
Advantages of smashed dermal graft over conventional/enzymatic techniques
Smashed dermal graft is soft and easily mouldable to any shape, thus can be accurately tailored for all types of acne scars; surgical time is reduced by three times; the epidermis acts as a marvellous biological dressing material, minimizing the chances of infection and reducing recovery time; minimizes the scarring at donor area resulting in good cosmetic appearance [Figures 12 and 13]; increases patient's as well as dermatosurgeon's comfort and hence can be a preferred method when larger areas have to be corrected. Finally, it is cost-effective and easy to perform. Maximum follow up period was 12 months. Before and after result photographs of a patient are shown in Figures 14–17.
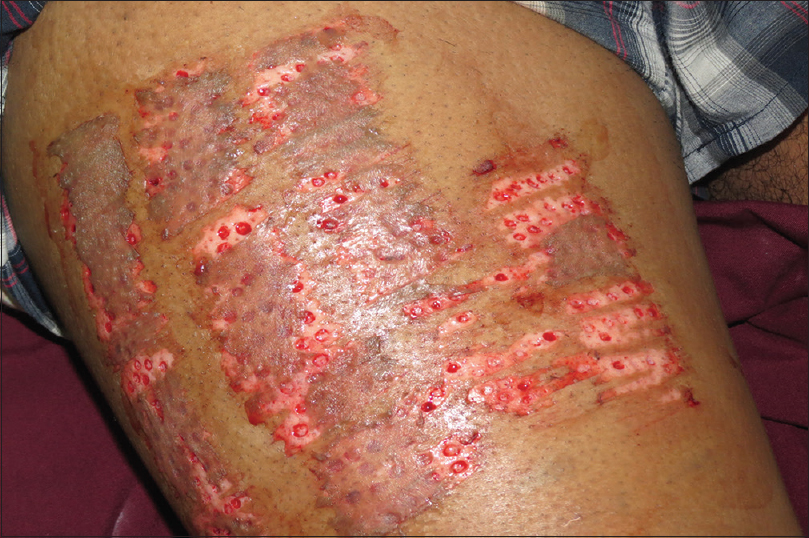
- Donor area on day 1 before dressing
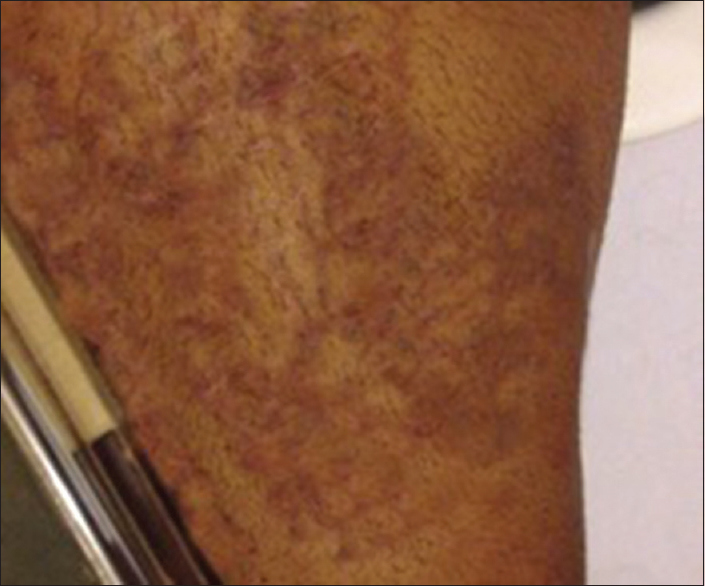
- Donor area after 3 months
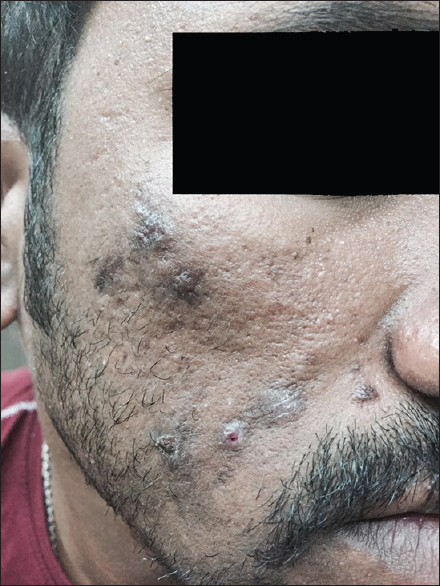
- Baseline-The right cheek
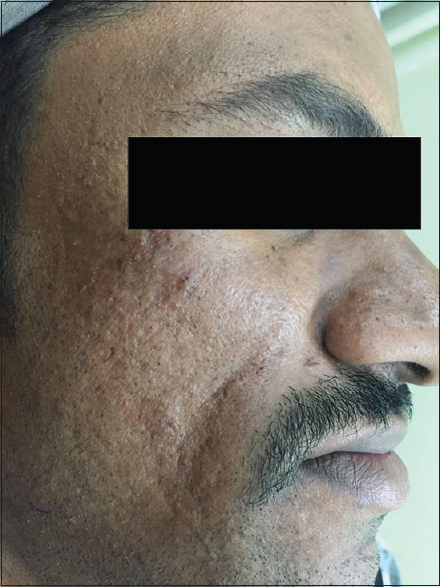
- After 12 months-The right cheek
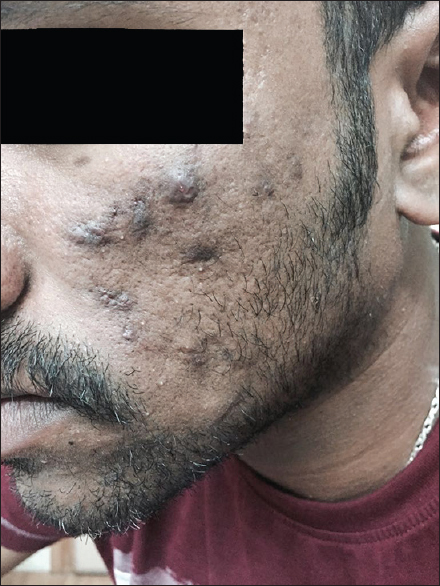
- Baseline-The left cheek
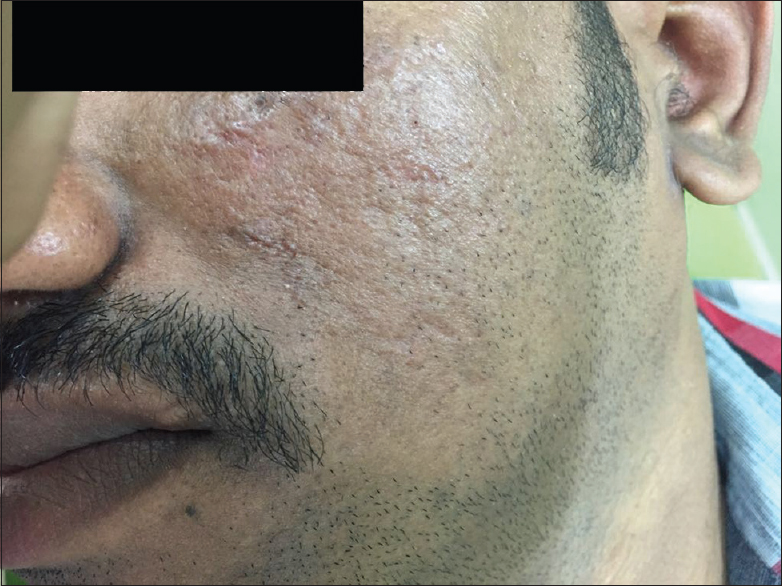
- After 12 months- The left cheek
Future scope for smashed dermal grafts
In our experience, we have found it to be suitable for chickenpox scars, linear scars, replacing filler in nasolabial correction and in inactive en coup de sabre.
CONCLUSION
This modified dermal grafting technique, which combines ultra split-thickness grafting and smashed dermal grafting, results in good improvement of the acne scars and also improves the cosmetic appearance at the donor area.
Financial support and sponsorship
Nil.
Conflicts of interest
There are no conflicts of interest.
REFERENCES
- Klein AW, ed. Dermal grafting. Tissue Augmentation in Clinical Practice (2nd ed). New York: Taylor and Francis Group; 2006. p. :21-54.
- Resurfacing of atrophic facial acne scars with a high-energy, pulsed carbon dioxide laser. Dermatol Surg. 1996;22:151-4.
- [Google Scholar]
- Surgical management of acne scars. In: ACS(I) Textook of Cutaneous & Aesthetic Surgery. New Delhi: Jaypee Medical Publishers (p) Ltd; 2012. p. :392-406.
- A new treatment option for acne scars: Allograft dermis. Dermatol Nurs. 1999;11:111-4.
- [Google Scholar]
- Subcutaneous incisionless (subcision) surgery for the correction of depressed scars and wrinkles. Dermatol Surg. 1995;21:543-9.
- [Google Scholar]


